First some pictures of the box.


Everything is well and safely packed. The wing, fuselage and rudders are separated by styrofoam.


And now the building process
The only thing needed for building is CA glue like Zacki by Multiplex, screw drivers and pliers.
First I attached the landing gear. Because I wanted to fly or better land the MPX Stuntmaster on both grass and flat ground, I didn’t use glue. Instead I just inserted the landing gear without any adhesives. Doing so I’m able to remove it when needed.
 Afterwords the wing was inserted. Spanning only 87cm the wing is just one piece. Multiplex did a good job pre-assembling the plane: the right aileron horn is already glued in. So I had to slide the wing into the fuselage from right to left and stick it in place. Then the left aileron horn is glued in.

Now the elevator is glued in the same way.

Before the rudder can be installed a little fill piece must be stuck in.

Next step is installing the rudder. Add some CA to the pre-attached hinges to fix the rudder in the slots on the fuselage.


Now it’s time to stabilize the wing and the elevator. Elapor supports are glued to the bottom side of the wing to reinforce the wing braces. Similar braces are used to stabilize the tailplane from the bottom.


To finish the plane ailerons, elevator and rudder are connected to the pre-installed servos. The rudder can be connected in two ways: using pull-cables or a pushrod installed on the ailerons and the elevator. I used the pushrod as it is much easier to attach.
The brushless motor was already installed, so the last thing to do is attach the propeller. To do that I pushed the little metal adapter ring into the back side of the prop. The prop now fitting perfectly onto the motor is attached via a rubber ring to the installed prop-saver.
Here is the finished plane on the bench …

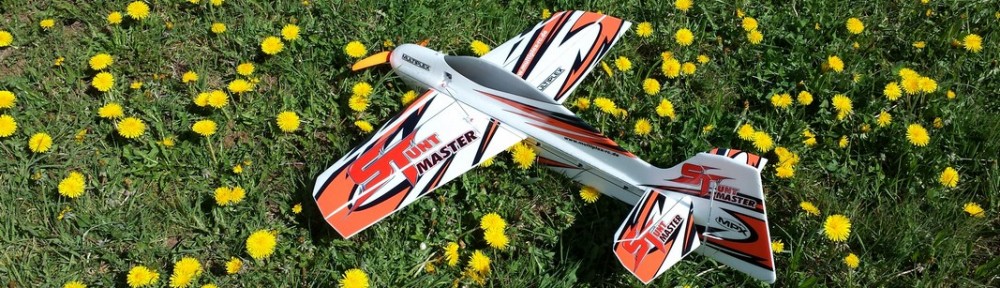
… and after the first flight.

I wil prepare a report about the Stuntmaster in FunFly and in Modelbouwactueel. Dutch.
Great!